It is too hard to move the two halves of the cowling around the engine to get the proper placement so the obvious thing to do was to join the two on the bench and drill pilot holes for clecoes. Here are the two halves taped and marked for holes

And with clecoes in freshly drilled pilot holes
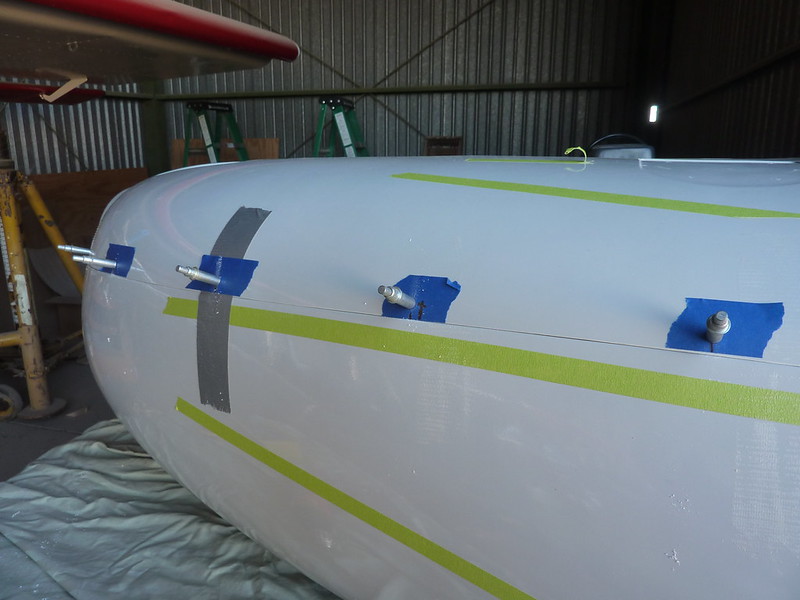
The skybolt kit comes with two regular nutplates and I couldn’t work out where they should go. The advertising blurp [sic] says that the kit allows you to remove the cowling with only two screws to take out at the front. So I drilled these holes at the very front for the nutplates.
But this is clearly ridiculous, to get at those screws you’d have to remove the spinner first which would mean 11 screws to get at the cowling. I suppose those holes can now add to the air that goes into the engine. I’ve asked SkyTek where the nutplates are intended to go but I presume on the side, but far forward.
With cleco holes drilled, it was now fairly easy to assembly the two halves over the engine and manipulate it into place.
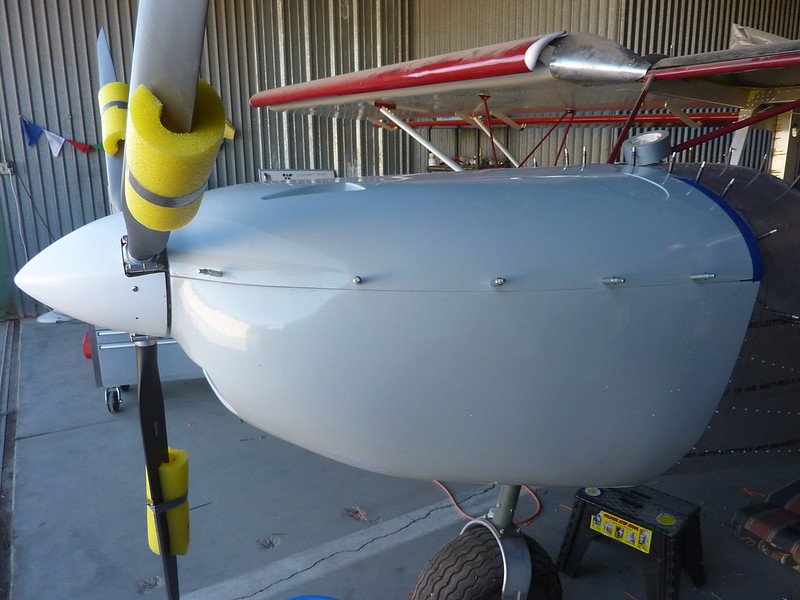
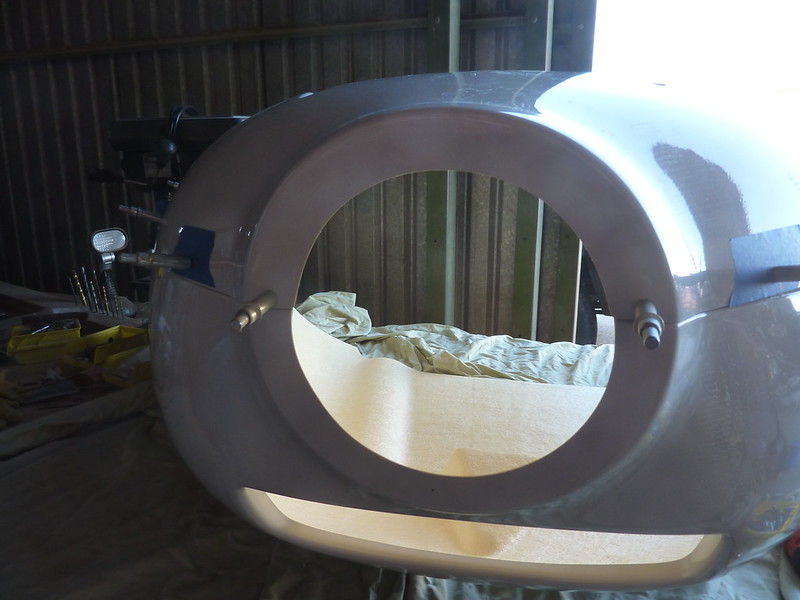
To get the proper 6-12mm gap at the spinner, the cowling needs to move a few mms aft and to do that there will need to be a little bit more trimming needed. After that, I can drill the holes into the top skin, remove the cowling and work on the fasteners at my leisure.
While doing all this I noticed what I thought was a new fuel leak under the pilot side (you know, the side I’ve already riveted everything in place) and there sure was a damp spot but we couldn’t tell where it was coming from. So I put some paper down and came back the next day to see this
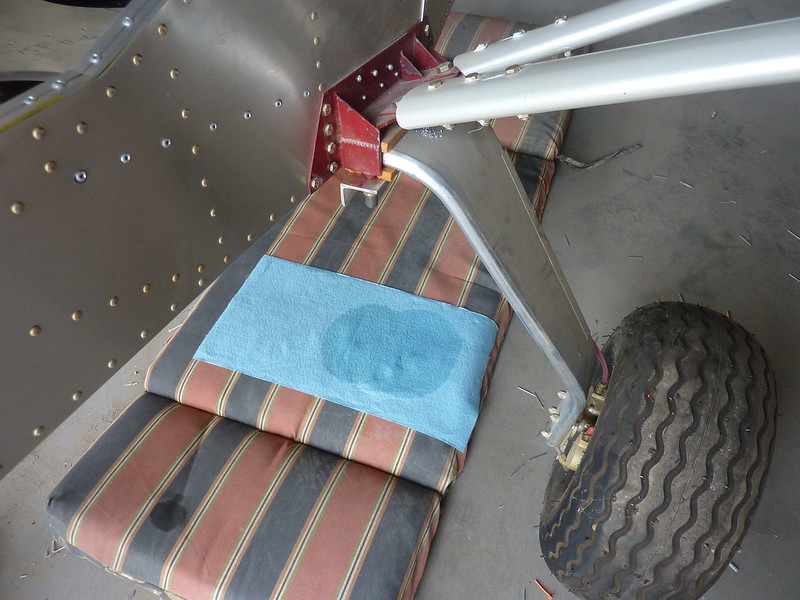
Not good, and a little investigation showed it is leaking out of the washer that is between the drain plug and the fuselage. I noticed the plug wasn’t very tight which might be a factor but I’m sure this wasn’t leaking before I riveted the seats in. And with the seats in, probably the only way to get at the fuel line there will be to cut a hole in the baggage panel behind the seat. Sigh.
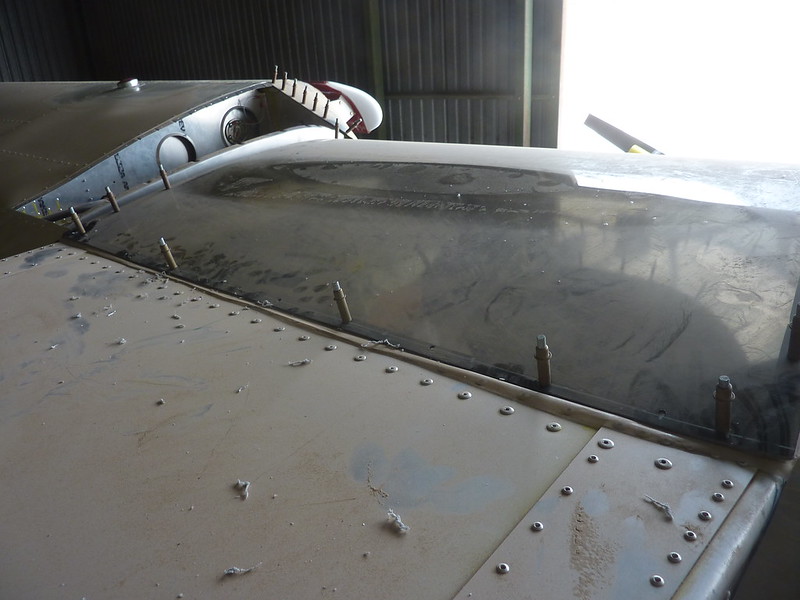
There isn’t much else to do with the panel still under construction (that is, the top skin can’t be put on permanently) so the only other things I could find to do were install my new ELT cable that my (wife’s) Uncle John made for me, and to finally put the back row of screw holes in the top window.
In panel news, I finally have a spare memory card to try in the panel but I need to format it on a PC first. MGL supplied me with the proper settings for the coolant and oil temp senders and let me know that I had got the fuel flow meter all wrong. You really must install it per their instructions not the ones I saw, which means power to 12V and a resistor across 5V on the data line. I thought the resistor was long gone but I’m happy to say I found it in the hangar this morning.
Engine start now probably still out a couple of weeks but one thing at a time, will get there (wherever that is) in the end. In the meantime I’ve ordered my required placards and will look to find some “EXPERIMENTAL” banners too.